

I knew I wanted to try my hand at Zbrush because It was supposed to emulate natural sculpting pretty well and Ive seen people do some crazy things with it. Even though I had practically Zero experience with it, besides sculpting a few spheres into quirky heads, I sorta jumped in the deep end so to speak.
I opted for creating the base mesh in Zbrush using Z spheres, and then exporting it into max to clean up a little. So that's what I did and after a little while when I brought it back into Zbrush to work on, this is what emerged. A basic anatomical armature of roughly my proportions.
 | ||
| Sadly this file was corrupted and I had to revert back to a earlier less detailed save. |
I would have stopped at the stage above, but since I had to
redo a lot of the anatomy, I ended up going a bit mental and
sculpting green hulk man... *shudders*
 |
| Still, this was fun to do |
 |
| Early armour progress |
I ended up just working with the overly muscular base mesh and began sculpting the
armour in loosely as you can see here. I played around with variations on the design but ended
opting for something that resembled my concept more closely.
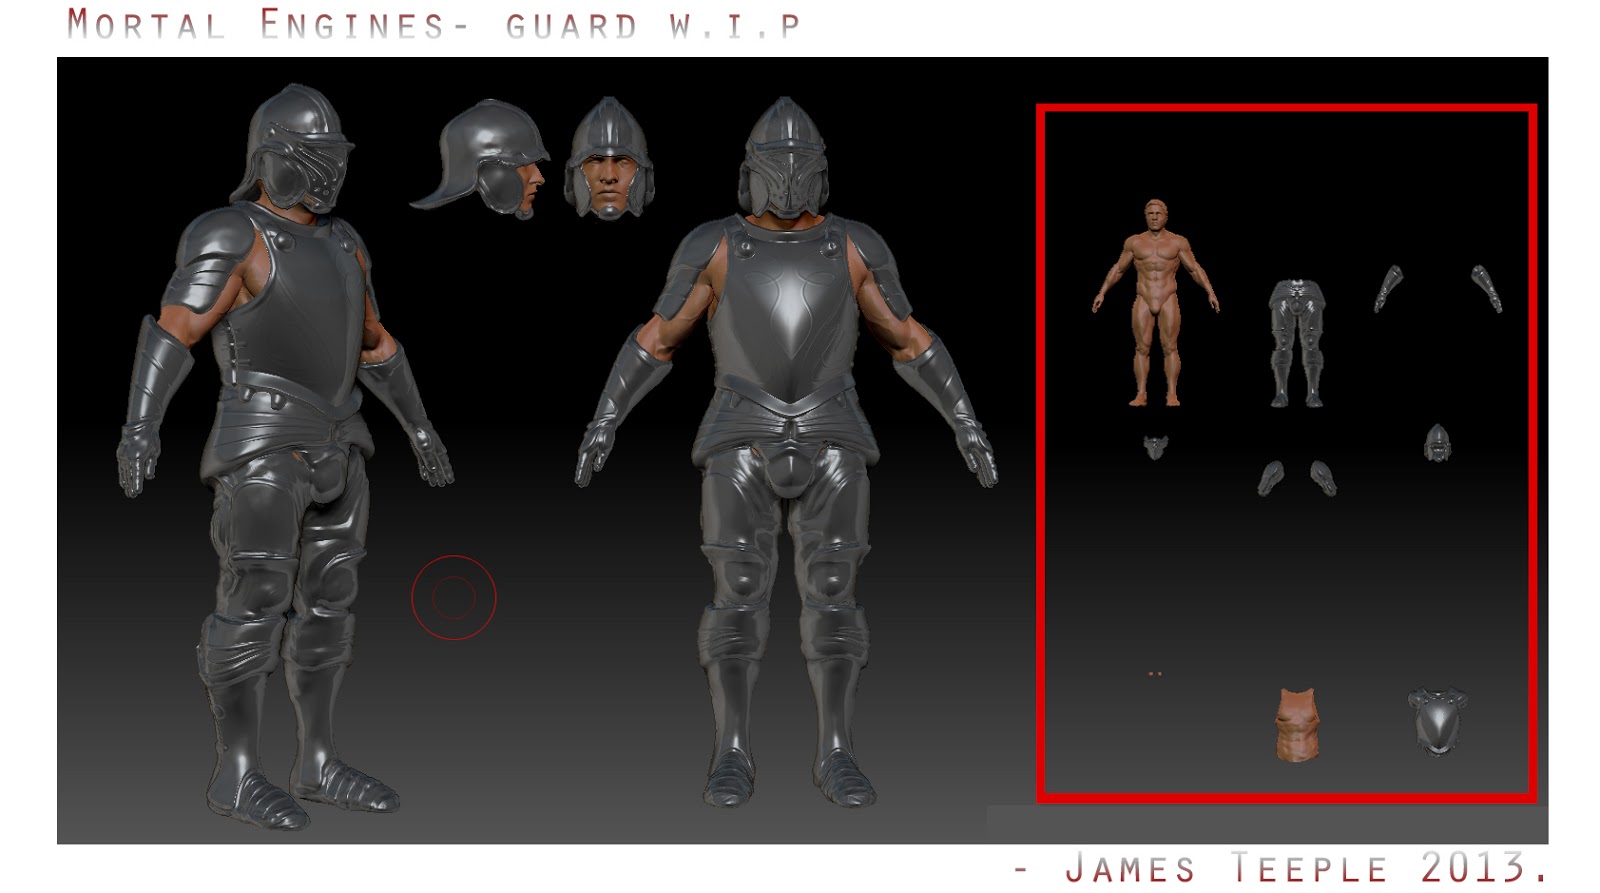
So multiple crashed, hours of lost work and 1 week later, here you can see I've just about finished the high poly model. I would have refined it more but I was already behind time and the hard surfaces of the armour took me too bloody long...

 |
| Visor down - turn around. |

I definitely feel like once I had a firmer grip on the UI and knew how to use a few tools,
Zbrush and I got along just fine.
Here is where I focused a fair but of time trying to accurately represent my head and face likeness. I redid this stage perhaps too much, and I'm still not very happy with it, but it did the job well enough.
 |
| Self Portrait - I neglected hair because it would be covered up and I was out of time. |

The one bad thing about this stage, was how long it took me. I spent nearly a week learning and sculpting this dude, and because of that, I fell pretty far behind the schedule to getting the whole thing finished on time.
No comments:
Post a Comment